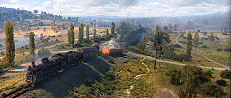
3-Mark Game in Chaffee on Prokhorovka
Link: Link copied to clipboard
Personal Score
Team Score
Detailed Report
Victory

|

|

Spotter
Spot enemy vehicles, enabling your allies to cause 1,000 HP of damage in one battle.
• Win the battle. • The series is extended for every 1,000 HP of damage caused by allies to enemy vehicles spotted by you in one battle. • Every vehicle has its own series. • Only the longest series is counted. • Can be obtained in Random Battles only. |

Bruiser
Damage enemy vehicles' modules or injure crew members at least five times in a battle.
• Modules damaged by fire are counted. • Can be obtained in Random Battles only. |

Fire for Effect
Cause more damage to enemy vehicles than the hit points of your vehicle.
• Damage caused by ramming or setting enemy vehicle on fire is included. • Unavailable for SPGs. • Can be obtained in Random Battles only. |
46 401
5 595
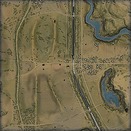
Prokhorovka – Standard
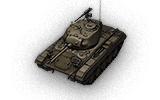
M24 Chaffee
AwesomenessPersonified [LOTE]
| Without Premium | With Premium | |
|---|---|---|
| Credits | 30 934 | 30 934 |
| Experience | 4973 | 5595 |
Battle efficiency
Σ:
3
1915
8
-
1325
6
-
- J_REB [XREDX] M10 RBFM
- TechTreeMaster [HAKRZ] Cavalier 1 2
- Outlander5175 105 leFH18B2 4
- Taratibo Bishop 1 1
- 5H4D3_ [QUEUE] Škoda T 24 1 2
- Luminia25 КВ-1С с МЗ
- totaltramp M10 Wolverine
- AggresivelyAverageGuy [VIVA] KV-1 3 6
- ctrixslayer Pz.Kpfw. V/IV 1
- jonathanpt_1 Ikv 103 2 4
{{ ::replay.translations.teams[teamKey] }}
| {{ ::player.platoon }} | {{ ::player.username }} | {{ ::player.tank }} | {{ ::player.damageDealt }} | {{ ::player.frags }} | {{ ::player.xp }} | {{ ::player.achievements.length }} |
{{ replay.detailedPerformance.username }}
{{ replay.detailedPerformance.tank }}
{{ replay.detailedPerformance.resultMapSurviveString }}
- {{ ::replay.translations.shots.fired }} {{ replay.detailedPerformance.vehicleShots }}
- {{ ::replay.translations.shots.hits }} {{ replay.detailedPerformance.vehicleHits }}/{{ replay.detailedPerformance.vehiclePierces }}
- {{ ::replay.translations.shots.heHits }} {{ replay.detailedPerformance. vehicleHeHits}}
- {{ ::replay.translations.damageDealt.total }} {{ replay.detailedPerformance.damageDealt }}
- {{ ::replay.translations.damageDealt.sniper }} {{ replay.detailedPerformance.sniperDamageDealt }}
- {{ ::replay.translations.received.label }} {{ replay.detailedPerformance.vehicleIncomingHits }}
- {{ ::replay.translations.received.pierces }} {{ replay.detailedPerformance.piercedReceived }}
- {{ ::replay.translations.received.noDamage }} {{ replay.detailedPerformance.noDamageShotsReceived }}
- {{ ::replay.translations.received.he }} {{ replay.detailedPerformance.heHitsReceived }}
- {{ ::replay.translations.received.blocked }} {{ replay.detailedPerformance.damageBlockedByArmor }}
- {{ ::replay.translations.friendlyFire }} {{ replay.detailedPerformance.vehicleTKString }}
- {{ ::replay.translations.spotted }} {{ replay.detailedPerformance.vehicleSpotted }}
- {{ ::replay.translations.damaged }} {{ replay.detailedPerformance.vehicleDamaged }}/{{ replay.detailedPerformance.vehicleKilled }}
- {{ ::replay.translations.damageAssisted.label }} {{ replay.detailedPerformance.vehicleDamageAssist }}
- {{ ::replay.translations.damageStunned.label }} {{ replay.detailedPerformance.vehicleDamageAssistStun }}
- {{ ::replay.translations.stunsCaused }} {{ replay.detailedPerformance.vehicleStunsCaused }}
- {{ ::replay.translations.capture }} {{ replay.detailedPerformance.vehicleBaseCapture }}/{{ replay.detailedPerformance.vehicleBaseDef }}
- {{ ::replay.translations.mileage.label }} {{ replay.detailedPerformance.vehicleMileage }}
Statistics
- {{ ::replay.translations.shots.fired }} 33
- {{ ::replay.translations.shots.hits }} 25/20
- {{ ::replay.translations.shots.heHits }} 0
- {{ ::replay.translations.damageDealt.total }} 1915
- {{ ::replay.translations.damageDealt.sniper }} 332
- {{ ::replay.translations.received.label }} 2
- {{ ::replay.translations.received.pierces }} 2
- {{ ::replay.translations.received.noDamage }} 0
- {{ ::replay.translations.received.he }} 1
- {{ ::replay.translations.received.blocked }} 0
- {{ ::replay.translations.friendlyFire }} 0/0
- {{ ::replay.translations.spotted }} 6
- {{ ::replay.translations.damaged }} 7/3
- {{ ::replay.translations.damageAssisted.ownLabel }} 1325
- {{ ::replay.translations.damageStunned.ownLabel }} 0
- {{ ::replay.translations.stunsCaused }} 0
- {{ ::replay.translations.capture }} 0/0
- {{ ::replay.translations.mileage.label }} 5,17
Credits
With Premium
| Received | 30 934 | 30 934 | ||||
| Fine for causing damage to allies | 0 | 0 | ||||
| Compensation for damage caused by allies | 0 | 0 | ||||
| Auto-repair vehicle | -1,798 | -1,798 | ||||
| Auto-resupply ammunition | -48,496 | 0 | -48,496 | 0 | ||
| Auto-resupply consumables | 0 | 0 | 0 | 0 | ||
| Total: | -19,360 | 0 | -3,893 | 0 |
Time
- Starting time 15:05
- Battle duration 13 min 49 s
- Time of destruction -
Experience
| Received | 1 243 | 62 | 1 243 | 62 | ||
| Fine for causing damage to allies | 0 | 0 | ||||
| Action / Personal missions payout | 3 730 | 0 | 3 730 | 0 | ||
| Total: | 4 973 | 62 | 5 595 | 93 |
- Version: 1.20.0
- Server game time: 2023-04-26 15:05
-
 Spawn: I
- Battle type: Regular
- Uploaded: AwesomenessPersonified
Replay description
Never really saw the appeal with the Chaffee until recently, when I started playing it regularly to train the crew up to 100% so they'd transfer up the tech tree with minimum penalty.
I was extremely pleasantly surprised at how comfortable I was in the vehicle (regardless of mm), and how almost effortlessly the combined dmg stacked up.
After grinding the crew to 100% I decided to go for the 3-mark, just to see if I could.
Equip: vents, exhaust, and optics.
Commander: BIA, Camo, Recon, and partial fourth skill.
Radio operator: BIA and Camo, and partial Sit-Aware.
The rest of the crew is full BIA, and almost full Camo.
Enjoy!
Replay's comments (1)